How to Make a Fabric-Covered Clothes Hanger
perfect mix of function, beauty, and upcycling
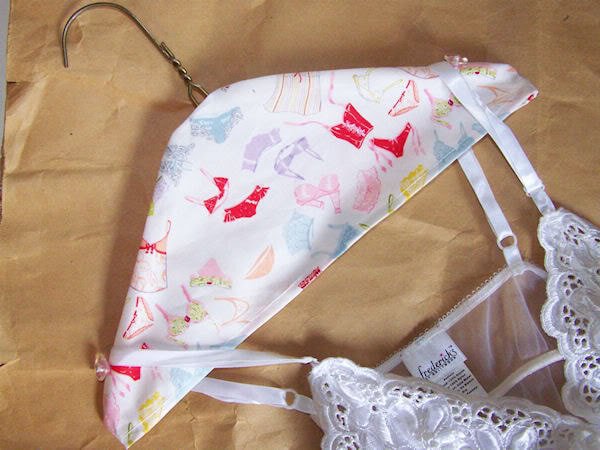
🧵 How to Make a Fabric-Covered Clothes Hanger
You’ll Need:
- Wire hanger
- Craft paper for a template
- Cute fabric of your choice (cotton works great just prewash and iron)
- Two small buttons (vintage if possible!)
- Sewing machine & thread
- Pins and scissors
- Iron
Instructions:
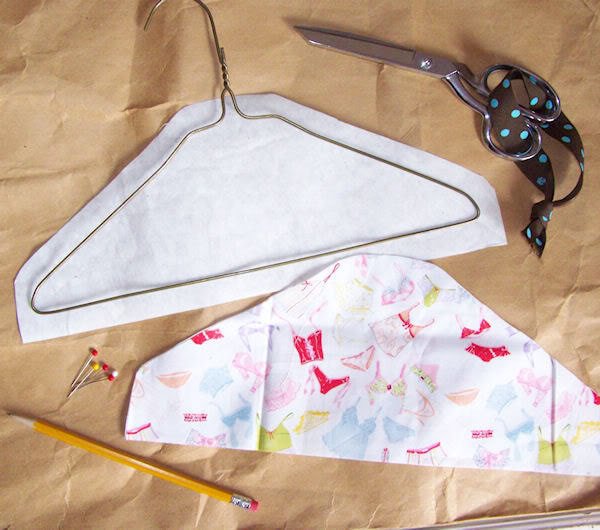
- Create Your Template
Lay your wire hanger on craft paper and trace around it. Add ½ inch to the sides and 1 inch to the bottom for seam and hem allowance. - Cut Your Fabric
Using the template, cut two pieces of fabric. - Sew the Sides
Place the fabric pieces right sides together. Pin in place, then sew the sides using a ¼–½ inch seam allowance. Stop about ½ inch short of the center top to leave room for the hanger hook to slip through. - Hem the Bottom
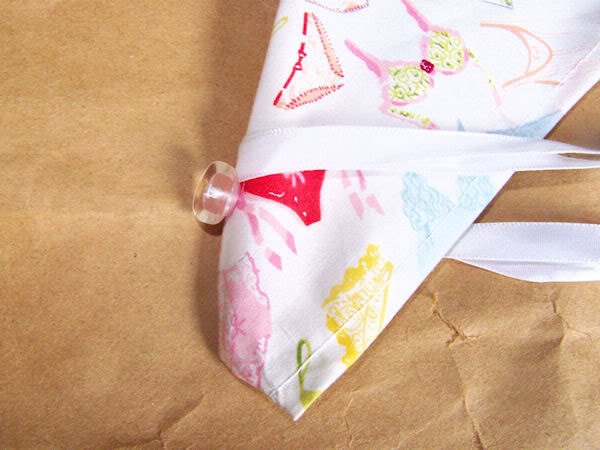
Turn up the bottom edge and hem all the way around for a neat finish. - Add the Buttons
For a non-slip feature, sew a small button onto each end of the hanger cover, right on the seam line. (I like to place them about an inch away from the curve.) - Finish & Slip On
Turn your cover right side out, slip it over your hanger, and let the hook peek through the top opening.
🌿 Gift & Use Ideas
- Pair with a handmade garment for a personal gift.
- Make a set for your guest room closet.
- Use cheerful prints for children’s clothing.
This little project is the perfect mix of function, beauty, and upcycling. It keeps clothing safe, dresses up your closet, and breathes new life into something you already have.
Happy sewing,
Aimee 🧵💛